Setting up webpack for chrome extension development
import BlogPostImage from “~components/BlogPostImage.astro”;
Today I learned how to setup webpack for chrome extension development. In this post I will show you how I did it. To start, you need to install webpack and packages from webpack ecosystem:
npm install --save-dev webpack webpack-cli html-webpack-plugin clean-webpack-plugin copy-webpack-plugin
First step done - now it is getting tricky. How to lay out development & production config to avoid nested ternary operators as you don’t want to spend 3 days setting up everything?
Create webpack.common.js. Here you gonna put common settings that will be used by both development & production config:
const path = require("path");
const HtmlWebpackPlugin = require("html-webpack-plugin");
const { CleanWebpackPlugin } = require("clean-webpack-plugin");
const CopyWebpackPlugin = require("copy-webpack-plugin");

module.exports = {
  entry: {
    popup: "./src/popup/index.tsx",
    background: "./src/background/index.ts",
  },
  module: {
    rules: [{ test: /\.tsx?$/, use: "ts-loader", exclude: /node_modules/ }], // do not forget to change/install your own TS loader
  },
  resolve: {
    extensions: [".tsx", ".ts", ".js"],
  },
  plugins: [
    new CleanWebpackPlugin({ cleanStaleWebpackAssets: false }),
    new HtmlWebpackPlugin({ template: "src/popup/index.html" }),
    new CopyWebpackPlugin({
      patterns: [
        { from: "./src/manifest.json" },
        { from: "./src/icons/icon16.png" },
        { from: "./src/icons/icon48.png" },
        { from: "./src/icons/icon128.png" },
      ],
    }),
  ],
  output: { filename: "[name].js", path: path.resolve(__dirname, "dist") }, // chrome will look for files under dist/* folder
};
Config above have 2 entry points - because I am using both popup and background scripts.
Webpack’s development config is a merge between common & dev configs:
const { merge } = require("webpack-merge");
const common = require("./webpack.common.js");

module.exports = merge(common, {
  mode: "development",
  devtool: "inline-source-map",
});
Prod configuration is following the same pattern:
const { merge } = require("webpack-merge");
const common = require("./webpack.common.js");

module.exports = merge(common, {
  mode: "production",
});
Lastly I have two commands for webpack
{
  "scripts": {
    "start": "webpack --watch --config webpack.dev.js",
    "build": "webpack --config webpack.prod.js"
  }
}
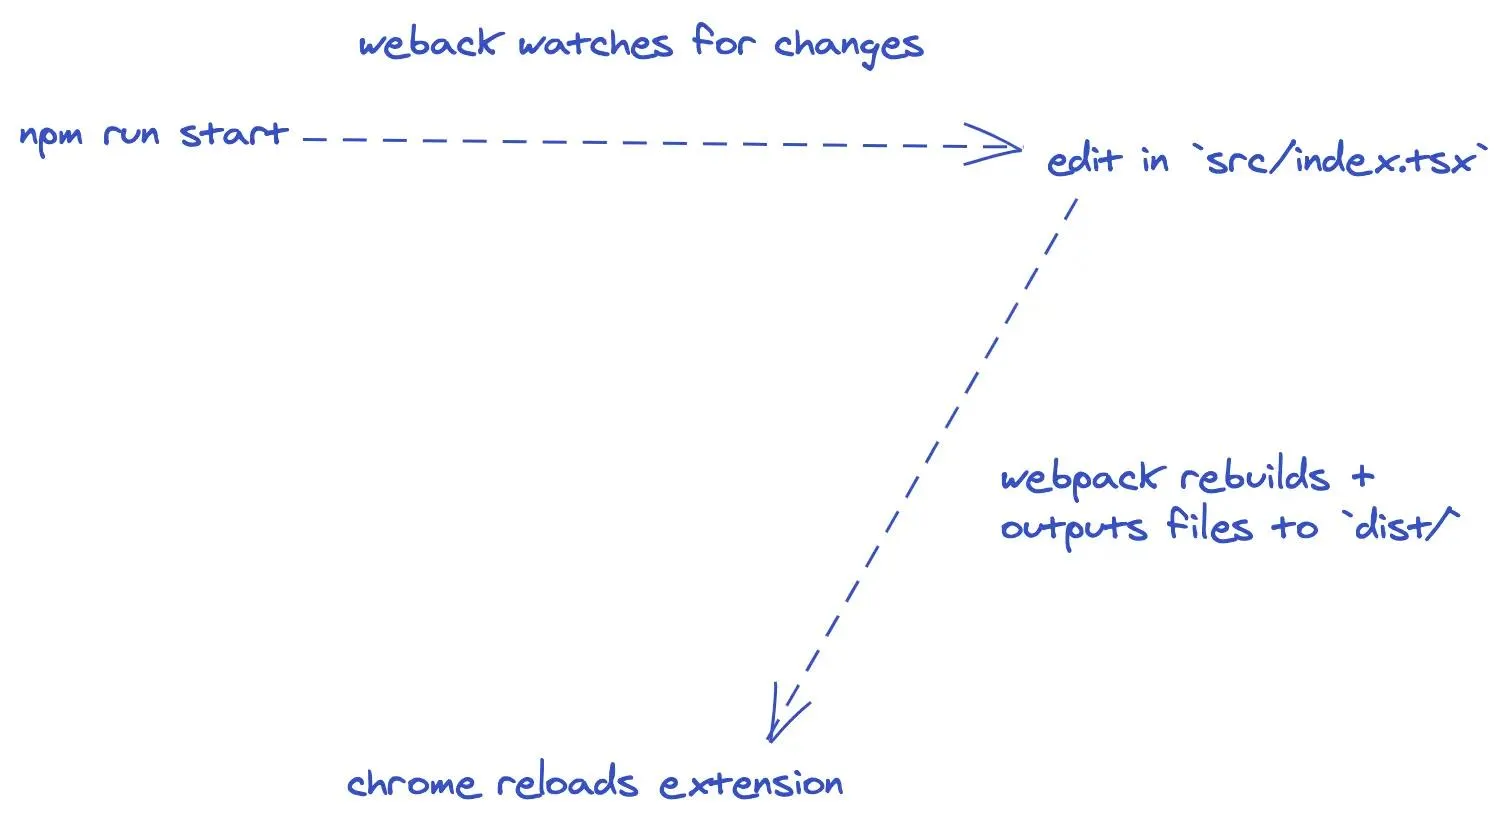
Below you have diagram presenting how npm start is working under the hood

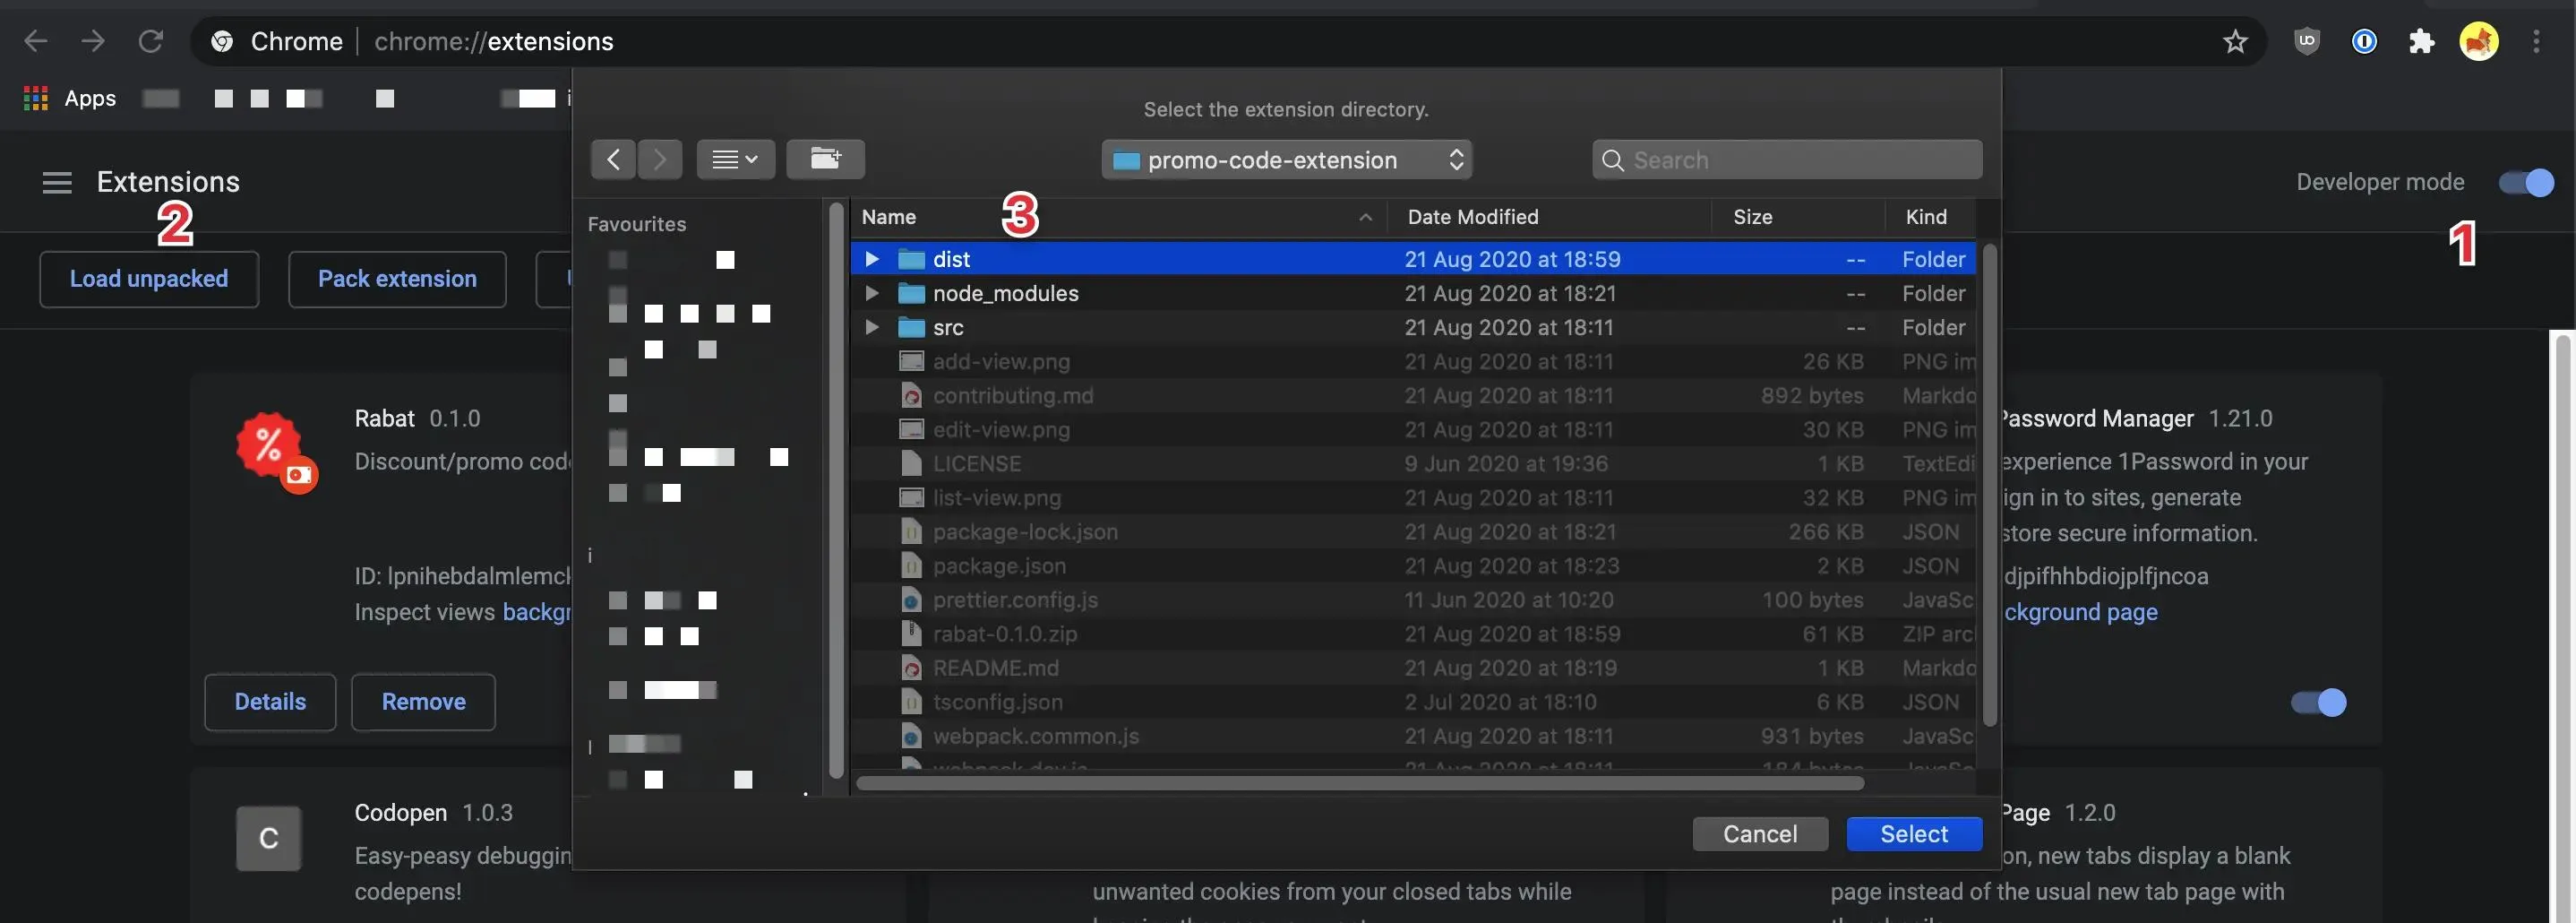
All you need to do after running npm start is to tell chrome that there is unpacked extension in the dist/* folder. To do that you need to go to chrome://extensions/ and select options which are visible in the picture below (numbers indicate ordered selection of buttons/switches):

Summary
In today’s blog post I described setting up webpack for browser’s extension development. You can check a working example in my latest side project - rabat.